 跳至内容
跳至内容 How to Install Solar Flood Lights: A Guide for Beginners
Quick Browsing
Toggle
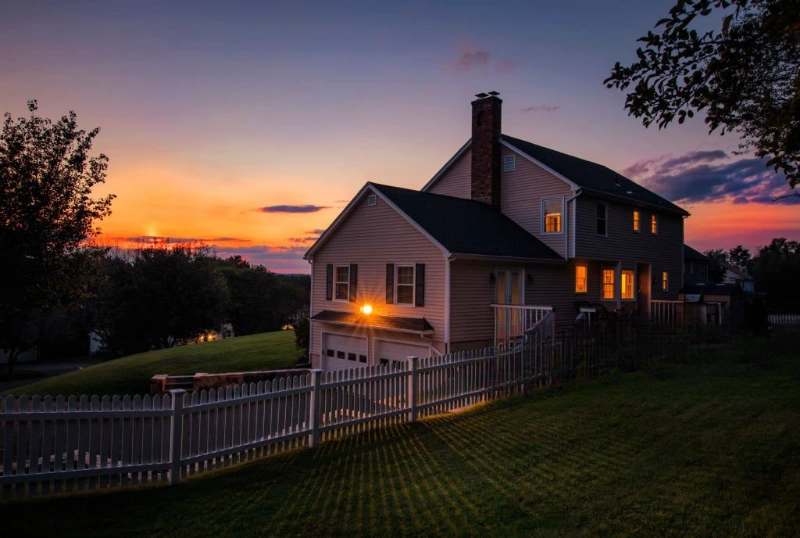
Solar flood lights are a green, cost-effective, and effective way to light up an outdoor area, making it safer and easier to see. They can change roads, draw attention to gardens, and keep people out who don’t belong there. This step-by-step guide will show you how to install solar flood lights so that they work as well as possible.
Step 1: Prepare Your Tools and Materials
When you buy from YDSL, your solar flood lamp kit comes with all the parts you need.
You only get these things together:
1. Screwdriver or a power drill
2. Ladder for working at heights
3. For marking, use a pencil or chalk
4. Wearing safety glasses and gloves
Step 2: Choose the Installation Location
Make sure you get as much sun as possible:
The solar panel needs to be in full sun for it to charge properly, ideally for 6 to 8 hours a day. Avoid shaded areas.
How it works and how much light it needs:
Think about the angle and purpose, whether you want to light up a path, your garden, or your home for security reasons.
Coverage Area Considerations:
Make sure the area you want to light up gets enough light.
Pro Tip: You can use YDSL solar LED flood lights in many ways, from decorative lights on the ground to overhead floodlights
Step 3: Preparing the Mounting Surface
Wall Installation:
Use a spirit level to mark where the screws will go so that everything is lined up perfectly.
Make holes for screws and, if needed, wall anchors.
Pole or Fence Mounting:
Secure the pole or fence in the ground and attach the mounting bracket firmly.
Ground Placement:
Level the ground and use the provided stakes for anchoring the flood light.
Step 4: How to install Solar Flood Light Without Drilling
If drilling is not an option (e.g., on delicate surfaces), you can use:
Adhesive Mounts or Clips: Strong, weather-resistant adhesive strips for attaching lights securely.
Clamp Mounts: Ideal for fences or gutters.
Considerations for No-Drill Installations:
Ensure the mounting surface is clean for better adhesion.
Double-check stability to prevent the light from falling.
Step 5: Attaching and Connecting the Components
Solar Panel Placement:
Connect the solar panel to the light fixture and position it to receive direct sunlight.
Battery and Motion Detector Setup:
Connect the battery if needed and adjust motion sensor settings for your security needs.
Most YDSL lights come with preset sensors for easy installation.
Step 6: Weatherproofing Your Setup
Built-in Waterproofing with YDSL Lights
YDSL lights are rated at least IP65, ensuring protection from rain and dust.
Double-check for any vulnerabilities and use silicone sealant around wiring if necessary.
Pre-Installation Checks:
Inspect all components for potential damage or cracks.

Step 7: Testing and Adjustments
Charge the Solar Panel in Sunlight
- Optimal Charging Time: Place the solar panel in an area that receives direct sunlight and allow the battery to fully charge, which typically takes between 5 to 8 hours depending on the intensity of the sunlight and weather conditions.
- Simulate Night Conditions: Once the battery is charged, cover the solar panel to simulate nighttime. The light should turn on automatically, indicating the setup is functioning as expected.
Adjust the Angle and Sensitivity
- Positioning the Light: Check the orientation and angle of the light to ensure it effectively covers the desired area. You may need to adjust the tilt to maximize illumination and optimize the detection field of motion sensors.
- Setting Motion Detection Sensitivity: Test the motion sensor by walking through its detection range. Adjust the sensitivity settings based on the installation area:
- High Sensitivity: For locations with frequent activity, such as entrances or pathways, to capture all movements.
- Lower Sensitivity: For areas where fewer detections are needed to avoid false triggers from wind-blown vegetation or passing animals.
- Coverage Optimization: Ensure that the motion detection range does not overlap into areas with unintended motion triggers, such as streets or neighboring properties. Fine-tune the angle and detection radius for precise coverage.
Step 8: Secure Cables and Components
Tighten All Screws
- Double-Check Fastenings: Carefully inspect every screw and bolt on the solar powered lamp and its mounting brackets. Ensure they are tightened securely to prevent the light from shifting or becoming loose over time. This is especially important for outdoor installations, where wind and other environmental factors could affect stability.
- Avoid Over-Tightening: While it’s crucial to have everything securely fastened, be mindful not to over-tighten screws, as this could damage the mounting brackets or light casing.
Secure Exposed Cables
- Protect Cables from Wear and Tear: Use cable ties, clips, or adhesive cable management systems to keep all exposed wiring neatly in place. Attach cables along walls, poles, or mounting surfaces, ensuring they are out of the way and not at risk of being accidentally pulled or tripped over.
- Weatherproof the Cables: If possible, run the cables through weatherproof conduits or use UV-resistant cable sleeves to protect them from exposure to sunlight, rain, and temperature fluctuations. This will help extend the lifespan of the wiring and prevent damage from the elements.
Adjust the Light Angle
- Fine-Tune the Illumination: Adjust the angle of the light head to ensure it provides maximum illumination of your targeted area. This might mean tilting the light to cover a wide pathway, highlighting a specific zone for security purposes, or focusing on areas that require more brightness.
- Consider the beam spread: Most solar powered outdoor flood lights have a beam angle adjustment range. Set it to cover the entire area effectively without creating dark spots or light pollution in unintended directions.
Step 9: Care and maintenance
1. Cleaning the Solar Panel
- Remove Dirt: Regularly clean off dirt and other material. Over time, solar panels can gather dust, leaves, bird droppings, and other things that can make them less effective at charging. If you want the panel to work at its best, clean it gently with warm soapy water and a soft cloth or sponge. Do not use rough chemicals or tools that could scratch or damage the surface of the panel.
- Cleaning Frequency: Cleaning may only need to be done once a month or once every season, depending on where you live. To keep energy intake at its best, areas that get a lot of dust, pollution, or rain might need to be cleaned more often.
2. Battery Replacement
- Lifespan of Batteries: About every two to three years, the battery that comes with solar powered LED light dies. Their ability to hold a charge decreases with age, which impacts how well the light works. If the lighting lasts less time or is dim even though there is enough sunshine, the battery needs to be replaced.
- How to Replace Batteries: For information on how to get to and replace the batteries, look at the device manual. To keep things safe and working well, always use replacement batteries that are compatible, preferably LiFePO4 or the type that the maker specifies.
3. Keep Sensors Clear
- Check to See If Motion Sensors Are Blocked: Plants, dirt, or other items can get in the way of motion sensors and stop the light from working right. Check the area around your solar driveway lamp every so often to make sure nothing is blocking the sensor. Cut back plants that are getting too big or get rid of anything that could get in the way of it working.
- Sensor Testing: Once any obstacles have been removed, if necessary, re-calibrate the sensor settings by changing the sensitivity and detecting range to get the best results. This will make sure that your light works correctly when there is movement in the area you set.
4. Structural Integrity Check
- Inspect Mounting Hardware: Every few months, check that all screws, bolts, and brackets are secure. The outdoor environment can cause hardware to loosen or corrode, compromising the stability of the fixture. Tighten or replace any parts showing signs of wear or rust.
- Monitor Light Performance: Pay attention to any changes in the light’s behavior, such as flickering or failure to turn on. Addressing these issues promptly can prevent further damage and extend the lifespan of your light.

Conclusion
Durable, weatherproof materials are used to make YDSL solar flood lamps that can stand up to bad weather. This makes it last longer, so it doesn’t need to be fixed as often, and it keeps shining brightly over time. If you take good care of your lights, like cleaning the solar panel and changing the battery every so often, they will work well for years.
If you know how to install solar flood lights properly and buy good products, like those from YDSL, you can make your outdoor space safer, more attractive, and better for the environment. This makes your home look better and helps make the world greener and more sustainable.
Related Products
Green lighting for a green life.
Professional and intelligent manufacturer
- Email: info@ydsolarlight.com
- Whatsapp: +86 18912106317
- Wechat: owen17173
